We may earn money or products from the companies mentioned in this post.
Duplicate Stitching How To – Also referred to as Swiss darning], duplicate stitching has always been a favorite technique of mine.
It really is a unique, fun surface embroidery method that allows you to easily embellish a plain sweater. You can use this technique to finish off a Weasley™ sweater.
Easy Way To Embellish A Sweater!
Decorating Sweaters With Duplicate Stitch
Duplicate stitching is a quick and easy way to embellish a plain sweater or maybe personalize a certain sweater for your favorite wizard.
The initial on the original sweater was knit-in using the Intarsia technique but why not add it using the duplicate stitch technique after the knitting is completed and before you assemble the sweater?
Learn duplicate stitching (also known as Swiss Darning) and turn any stockinet stitch knitwear into a canvas. Transform plain sweater fabric into a unique and extraordinary sweater.
Your embroidery can dress up any cardigan, sweater or vest and be as diverse as “Home Cooking” momentos, stylized flowers, decorating the ever popular holiday sweater or personalizing a simple sweater with a huge initial!
Although a duplicate stitch design can be quite elaborate[and expensive], it can also be quick and simple – as simple as adding a large initial letter to your stocking stitch canvas.
==> Check Out The Best Sellers In Knitting & Crochet
&
&
Guide To Duplicate Stitch Duplicate Stitch Primer
 Duplicate Stitch Made Easy
&
A Duplicate Stitching How To
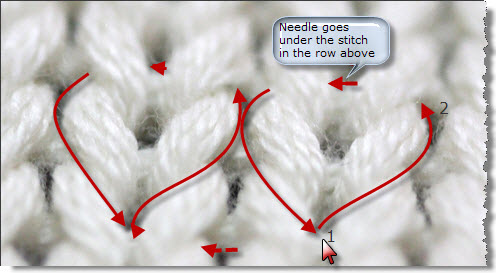 The duplicate stitch technique consists of embroidering over your stockinette stitch sweater fabric by duplicating the “knit stitch”.
For full coverage of your base fabric, always use yarn of the same weight and same fiber.
If your sweater is wool, use wool (preferably the very same wool) to duplicate stitch any design.
In the same vein, if you would like to embellish a plain acrylic sweater, then use an acrylic yarn to replicate an initial or a graphed design.
There are occasions when your duplicate stitching may involve a variety of fibers to complete the design. This is where you know the sweater will automatically have to be dry cleaned.
Use a tapestry needle with a blunt, rounded point. Stay away from the huge, plastic needles! The edges on these needles are not smooth and will damage your yarn as you embroider.
A Size 26 needle works for worsted weight yarns and size 17 or 20 work well with fingering and sports weight fibers. You are the best judge of the size which is ideal for the fiber you are working with.
Most yarns are plied so you want the eye of the needle to be large enough to pass the yarn through without stripping it. The blunt point will allow you to pass through the sweater fabric easily.
Use a sharp point when surface embroidering the fabric rather than duplicate stitching.
Duplicate Stitching How To: Simple Duplicate Stitch Sample
Highlight Details
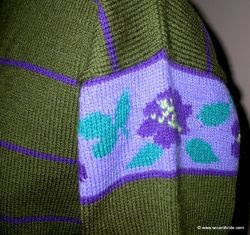
This type of “Swiss Darning” is used to highlight an Intarsia design and illustrates the many facets of duplicate stitching.
It can be as simple as covering the base knit stitches with the contrast yarn by following a graphed design or as complex as combining plain duplicate stitching and regular embroidery stitches.
Simple or fancy…make it yours and yours alone.
For this dropped shoulder sweater, there is a minimum of duplicate stitching at the top of the sleeve…a few stitches of lime color to create detail on the purple flower. Just a few stitches strategically placed not only add a pop of color but create petals and the stigma.
Embellishing The Home Cookin’ Cardigan
Duplicate Stitching How To: From Simple Highlights To Added Details
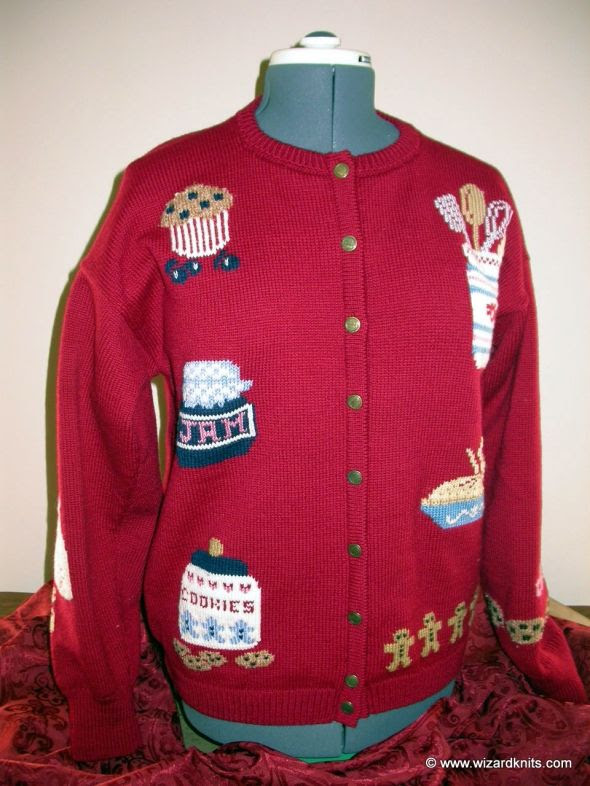
If this is your first duplicate stitching project, we recommend you use light and bright colored yarns.
Duplicate Stitching How To Note: Work your duplicate stitching before assembling the garment. It is much easier, and lighter, to support a single piece of knit fabric when working with tapestry needle and “thread”. You are not using a frame as you would in regular embroidery so make it easy on yourself.
We like to spread the knit piece on a hard surface such as a cutting mat. The knit fabric does not stretch as much as when you are holding it on your lap and it makes for more even duplicate stitches.
Pre-position your design on the sweater fabric by either locating the top, bottom and sides and placing yarn markers at each of the four points or use a long running stitch to visually create the boundaries of your duplicate stitch canvas.
A few preparations before your begin your project is well worth the time as you do not want to complete your Swiss darning project only to find that the entire design is a few stitches off horizontally or vertically.
Do not use a long piece of yarn to duplicate stitch. The yarn will curl, twist, fray, even knot itself and cause problems. An 18 to 20 inch length of yarn is about right.
Come up through the sweater fabric from the back, in the hole created by the loop of a stitch. Check your design and begin on the right edge so as to follow the natural line of the stitches you are covering with the duplicating stitches. Leave a 2 to 3 inch long tail at the beginning and at the end. These tails can easily be hidden later.
Once you have a rhythm going, you will be covering a whole row of your graphed design in no time at all!
More Duplicate Stitch Samples
Duplicate Stitching How To: Plain Duplicate Stitch Embellished With Regular Embroidery

Duplicate Stitching Detail
Kick it up a notch or two by adding regular embroidery stitches to your basic duplicate stitching.
Watch your design take on another dimension.
Use smooth yarns for the base (remember, you are in effect, covering the knit fabric stitches) and then “paint” with angora, Kreinik metallic threads, embroidery floss or a combination of all the above for spectacular results.
The great aspect of surface embroidery on knits is that you can dig into your stash and use just about any weight of yarn to produce the desired effect…a bouclé can easily dress sheep, angora becomes “fur”, and metallic threads add dazzling details.
This is where nubby yarns and mohair work wonders in giving your design a three dimensional look. Forget about using them for the base design – save them for embellishment purposes.
You might consider angora to be fuzzy as well…but it is evenly fuzzy and provides better stitch coverage than a mohair fiber. It also does not create some of the embroidering problems associated with the use of mohair.
If you are duplicate stitching the Weasley® initial, use a compatible “smooth” yarn, not a textured, tweedy yarn as one might use to knit the actual pullover.
Alphabets to Stitch Alphabets Galore
 A Big Collection of Alphabets
&
Duplicate Stitching How To: Duplicate Stitch “Initials” For Personalized Sweaters
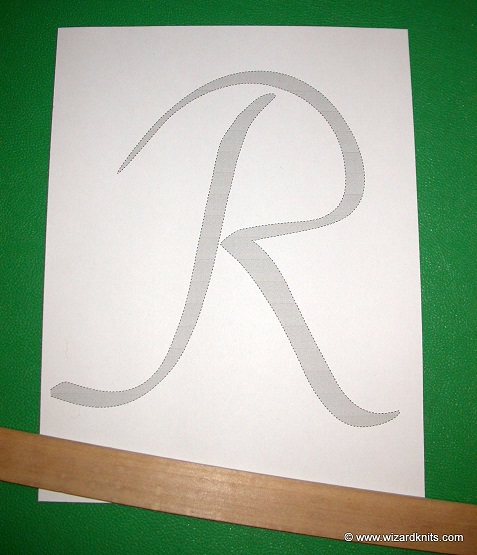
Why not use duplicate stitching to personalize your sweaters?
Add a mini monogram to the bottom of the sleeve, about an inch above the ribbed cuff or go big with a massive initial either centered on your sweater Weasley® style or a smaller version positioned at the top left of the sweater front?
This is where you can make almost as many styles of lettering as there are fonts which are perfect for duplicate stitching where you can easily combine duplicate stitching and embroidery.
Remember, you can duplicate a whole stitch but you can also duplicate stitch half a stitch for added detail. If you don’t care for the irregular edge created by simple duplicate stitching, you can edge it with a running stitch or chain stitch in a lighter weight of yarn.
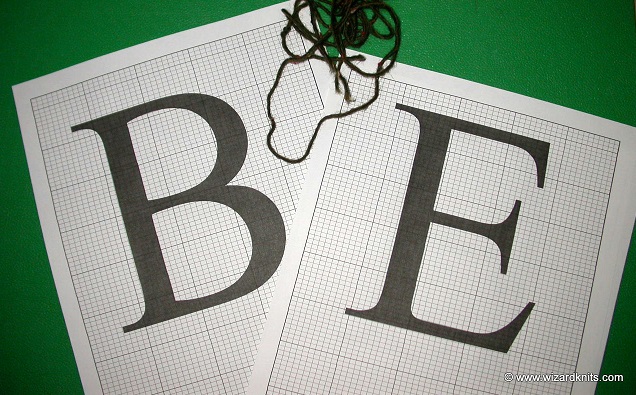
We work with sweaters in every size so we developed a method of quickly graphing out a letter to match not only the stitch and row gauge but also the finished size of the sweater.
To visually determine if your graph is the correct size, draw out the diagram of your sweater front on newsprint using actual measurements – just like a paper pattern.
Place the letter graph over the paper pattern to see if it is a good fit.
Now is the time to fix it. We do not recommend “unpicking” your duplicate stitching.
A couple stitches will not harm the fabric but even unpicking an entire row will leave a mark.
This is how we produce quick templates for both the standard initial and the script version of the later version of the Weasley® sweater using the “WordArt”© features in Microsoft WORD.
You can also hand draw the letter of your choice on the graphed paper. It’s not unusual for us to tweak the outer edges of the template a bit as the stitching will never come to a perfect point, regardless of the selected font.
Create a sheet of graphed paper using the graph paper calculator. It even accepts decimal points so you will be very close to your garment’s stitch and row gauge for an accurate visual of the design size.
&
&
- Print our several sheets of your graphed paper.
- Open a NEW document in Microsoft Word.
- Click on View, then Toolbars > Enable Word Art and Drawing toolbars.
- Position your cursor in the center of your page.
- From the Drawing Toolbar, select “Insert Word Art”.
- From the “Insert Word Art” window, select the very first window in the WordArt style menu. It is an outline letter.
- For the font, select “Times New Roman“, for size select “72“. Replace “Your Text Here” with the initial of your choice.
You can start with size 72 and try size 80, but a larger font will not fit on an 8 ½ by 11 sheet of paper.
Once you have inserted the initial in the center on your document, select the letter. A box will appear around the letter.
Right click and select “format word art”. Select the “size” tab – edit the height and width to replicate the size letter which would be proportionate to the front of your sweater.
DO NOT “lock the aspect ratio”.
Duplicate Stitching How To Note: For an adult “Weasley®” sweater, the initial should be about 6-7 inches tall and probable no more than 6.5 wide. Which ever size sweater you make, make the letter nearly square but just a wee bit taller than it is wide.
Experiment with various measurements. Start with a height 5.47″ and a width of 4.25″ for the smaller sized sweaters.
Do a print preview of your document to visualize the size of the letter. You can also print the document, fold or cut close to the initial outline and place the template on the sweater.
You can even use this method to create templates for the script style appliqued initial seen on the second version of Ron’s sweater.
Yes, there are many scripts out there on the internet that will print out an asymmetrical grid using your stitch and row gauge data but all it does is print out a sheet of graphed paper.
You would have to draw out your initial on that grid sheet or use the grid paper as “printer paper” for your WordArt© initial.
This particular set of directions will actually place the letter on the graphed grid lines and allow you to adapt the chart to combine duplicate full and half stitches.
Although you would have no trouble following the directions if familiar with Microsoft WordArt©, apologies are in order to all those who purchased the Hillbilly Housewife’s Everything But The Kitchen Sink package. The instructions for the Initial Templates included in the bonus were originally written in Word 2003.
We have re-written them using the features found In Word 2010.
- Open a new document in Microsoft Word.
- Click on View tab>
- From the selections in the tab menu, enable the “Ruler”
- From Toolbars>and enable the “Formatting”, “WordArt” and “Drawing” toolbars.
- From the HOME tab, you can select all the “Formatting”
- From the Insert Tab, select WORD ART and SHAPES (Drawing)
- From the Insert tab>
- Mark the center of your ruler. Use the enter key to position the cursor approximately half way down the page.
- Use the tab key to position the cursor in the center of the page.
- Select WORD ART and from the selection pick the “Fill White Outline” letter. This opens the text box on your page.
Replace the default “Your Text Here” with a letter initial. “Select or highlight the letter and start with 72 or immediately “grow” your font to the right size. Size 500 nearly fills the page but the size your end up with depends entirely on the purpose for which it is intended. We grew our test letter to 600 but had to enlarge the text box to make it fit. Remember you can adjust the height and the width by dragging the points of the text box!
From the Word Art tab you can select a fill color, the dashed outline and any other “styling” you like. We had great fun twisting the initial by using the “text effect” option and then selecting “transform”. Use font color to make your initial stencil more visible on the page. Our standard fill is a Medium grey. You can add a dashed outline if you like. Baskerville Old Face is still our favorite font for Weasley© styled sweaters.
Make sure to pick a font that allows for easy cutting and stitching. You don’t want too many narrow areas which make it difficult to near impossible to attach, bond or otherwise secure to your surface.
With this duplicate stitching how to tutorial, sweater embellishment possibilities are endless!
[…] We all have a wonderful design to knit into (via Intarsia knitting) or duplicate stitch onto a sweater. Read more about how we embellish sweaters. […]
[…] is rolled with the cuffs and bottom edge trimmed with ribbing…or not! The initials were duplicate stitched. This style of sweater is very easy to wear and to dress up or dress […]