We may earn money or products from the companies mentioned in this post.
The Initial Sweater is here! The initial sweater from Hobbie’s House knitting collection can be with knit with or without the initial!
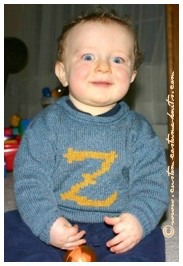
Remember our littlest wizards wearing their *Initial* sweaters? It was their very first Christmas Holiday season.
Ready to start knitting?
==> Pick from a beautiful selection of tweed yarns
Full Fledged Wizards!
 Twins, blue sweaters…sounds familiar?
That was more than 13 years ago and much larger sizes were recently commissioned for the Halloween season.
I’m talking adult sizes. A forest green and a dark blue – because blue is still the color 🙂
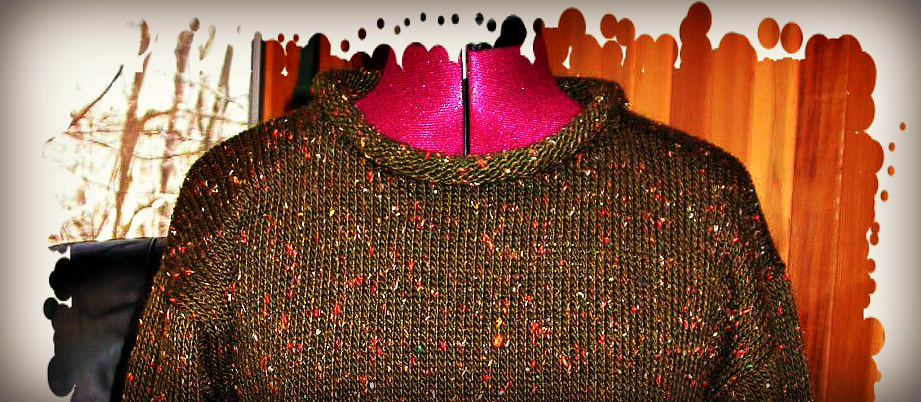
 In this post, the featured knitting pattern is for an adult version of the “wizard wear” rolled neck, initial sweater.
It is the same design as the sweaters knit for the twins but this adult version is knit in a dark olive wool and mohair blend. This design is adaptable to a variety of flecked, tweed, and variegated yarns.
The neckline is rolled with the cuffs and bottom edge trimmed with ribbing…or not! The initials were duplicate stitched. This sweater style is very easy to wear and to dress up or dress down.
Add a large initial and you have the replica of a very popular sweater!
It’s Hobbie’s version of the quick and easy “Weasley©” sweater. Adjust the gauge and knit the sweater in the new chunky tweed colors!
Knit in a Misses size 8, we call it the Roll Neck Initial Sweater.
It is a regular length, straight, roll neck pullover sweater with a ribbed bottom edge. The style is easy to wear – a drop shoulder jumper with full length, tapered sleeves, and ribbed cuffs. Want to make this an even quicker knit? Don’t make ribbed edges – just start knitting and let the edges roll!
The round (crew) front neck and shallow back neck ensure a good fit. The sweater features a rolled edge neckband.

Although we often knit our samples using production “shortcuts”, the rolled neck sweater is knit exactly as our pattern is written.
Cast on using your preferred method but we almost always opt for the most elastic cast on method taking the fiber content into consideration.
Please feel free to Contact Us with any specific questions regarding sizing and materials required to knit the Initial Sweater. However, don’t hesitate to contact us regarding any other sweater style from our collection of free knitting patterns.
We decided on a broad neckline so the sweater could be worn layered over a shirt or turtleneck.
The sweater is a very versatile style so the boys’ next Harry Potter Ron sweater will feature rolled edges on sleeves, bottom, and neck.
While the sweaters for children are knit in acrylic for ease of care, the adult sweater shown here is knit in a light, worsted weight yarn of blended fibers, finished with a rolled neckline and ribbed bottom edge and cuffs. It is more of an indoor sweater as the fabric is quite delicate.
Knitting The Initial Sweater:
SIZE: Standard Ladies 34 inches [Ladies 8]
YARN: Dalegarn “Sisik”; Color of your choice; 50 gr. = 148 yards
GAUGE: Stocking stitch over 4 in = 10 cm: 20.0 sts by 24.0 rows. Body knit on #6/7 US needles; Ribbing knit on #5 US needles or whatever size needles achieve required stitch and row gauge.
FINISHED measurements in inches with an “average” fit.
- Bust/Chest:36.3″ [2.3″ of added wearing ease]
- Width at bottom of sweater body:36.3″ [use of smaller needles to knit ribbing will cause fabric to pull in]
- Total Armhole:16.9″
- Top Neck Opening:7.0″
- Front Neck Width:3.2
- Front Neck Depth:3.4
- Width of sleeve above ribbing:7.9″
- Width of sleeve hem:7.1″
- Back Neck Width: 7.0
- Total Sleeve Length: 16.6″
- Back Neck Depth: 0.5″
- Sweater Body Length: 22.4″ [can be increased by adding rows during Step 2]
- Rib Hem Length: 2.0″
- Rolled Collar depth: 2.5″
- em Length: 2.0
Note: Read ALL these instructions thoroughly BEFORE starting to knit.
There may be sections where there are two shapings to work at the same time (such as necklines or waist shaping).
Initial Sweater Back:
Cast on 93 sts on size 5 needles. Work in K1P1 ribbing for 2.0 ins.Change to size 6/7 needles and Stocking Stitch.
Work even until piece measures 12.0 ins (72 rows), excluding hem.
Mark this row at both ends for armhole. Continue until armhole measures 8.0 ins (48 rows).
Shape neck. Work both sides at the same time. Work 29 sts. Slip the next 35 sts to a holder.
With the second ball of yarn, work remaining 29 sts.
Work even until armhole measures 8.7 ins (52 rows). Cast off 29 shoulder sts loosely.

Initial Sweater Front:
Follow steps 1 and 2 as for back.
Armhole. Mark this row at both ends for armhole. Continue until armhole measures 5.0 ins (30 rows).
Shape neck. Work both sides at the same time. Work 39 sts. Slip the next 15 sts to a holder.
With the second ball of yarn, work remaining 39 sts. Dec 1 st at neck edge every row 10 times, until 29 sts remain.
Work even until armhole measures 8.7 ins (52 rows). Cast off 29 shoulder sts loosely.

Initial Sweater Sleeves
Cast on 37 sts on Size #5 needles. Work in K1P1 ribbing for 2.0 ins. Inc 5 sts evenly across the row to 42 sts total.
Change to size 6/7 needles and Stocking Stitch.
Inc 1 st at each end of every 3rd row 3 times, then every 4th row 19 times to 86 sts (85 rows total, excluding hem).
Work even until sleeve measures 14.6 ins (88 rows), excluding hem.
Cast off loosely.

Left Shoulder Seam
1. Sew front to back along the left shoulder seam.
ROUND (CREW) FRONT NECK ROLLED EDGE COLLAR:
— on size 6/7 needles.— The rolled edge collar is worked in stocking stitch, which will roll naturally, with the purl side showing.
If you prefer to work on a circular needle, and eliminate the collar seam, sew the right shoulder before starting the collar.
With right side of work facing, pick up and work
2 sts from right back neck edge, 35 sts from back neck holder, 2 sts from left back neck edge,22 sts from left front neck edge, 15 sts from front neck holder and 22 sts from right front neck edge. Total of 98 sts.

Finishing. Sew remaining shoulder seam. Sew collar seam with an invisible seam. The collar can be left to roll naturally, or tacked in place. For a fuller look, it can be stuffed and then tacked in place.
Finishing The Sweater:
We always block wool sweater pieces individually before final assembly. Use your preferred blocking method but do not block the ribbing OR the rolled edges. Steam blocking sets the stitches and in this case you want both the ribbed edges and rolled edges to keep their elasticity.
- Sew sleeve top to armhole, easing to fit. We use crochet to attach sleeves. Sew side and sleeve seams. Sew any remaining seams.
- Darn/weave/sew in all loose ends.
- Our motto is that the interior of the sweater should look just as good as the outside. 🙂
Measure a sample piece for a more accurate calculation. We recommend purchasing 1-2 extra skeins of the same dye lot.
Approximate Yarn Amount Needed:
- 3 oz.for the body and sleeves;
- 1.4 oz. for ribbing and/or hems;
- .6 oz. for collar;
- 15 ounces TOTAL
Pattern designed and edited by: Hobbie’s House Designs © 2006
